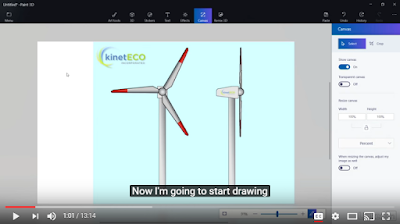
Tutorial for creating 3-D in a PowerPoint presentation using Paint 3D
(from Microsoft and LinkedIn Learning).
(from Microsoft and LinkedIn Learning).
Having a integrated platform is particularly useful for scientific and engineering presentations where a simple display is desired with minimal training and digital bandwidth requirements. Although PowerPoint is not an open source platform, packages such as Open Office Impress does many of the same things I will show you here. To create your own image, you will have to become proficient in "working with shapes". Create a 2-D shape, and overlay/join multiple 2-D shapes [2] if you prefer. Right-clicking on the shape allows you to recolor, extrude, and rotate the shape as desired.
An cross-organizational advertisement for Google Summer of Code offerings. This example demonstrates a background plus a variety of composite shapes (more on these later).
A project advertisement for the DevoWorm group. This example demonstrates surface definitions and object embedding.
A project advertisement for the DevoWorm group. This example demonstrates surface definitions and object embedding.
We will begin our discussion with a few simple examples that I created in a short period of time. These types of objects can be used symbolically, decoratively, or as a labelled object. While joined objects can be rotated and sized (as in something like Blender), composite objects are a bit trickier to work with.
Simple "doo-dad" in stationary 3-D. Components not joined.
Architectural feature in stationary 3-D. Components not joined.
In both examples (particularly the latter), multiple shapes are combined to produce a 3-D geometry. In the first example, four circles and an oval are used to build a mechanical "doo-dad". In the second example, 15 cubes are layered and rotated to form three isometric rows. These are joined at the row ends by two flat rectangles layered so as to achieve the visual illusion of continuity. To achieve the desired visual effect, the shapes were not physically joined. They do, however, create an appropriate visual effect.
Creating a donut shape in PowerPoint from a circle.
One way to see the advantage of using extruded objects to achieve 3-D is to discuss the concept of stereoscopy. Shown below is an elaborate design that appears to have depth cues, but is actually the same pattern that overlaps at a narrow visual angle. While a series of offset cubes provide the illusion of depth, overlapping squares does not produce very rich depth and orientational cues. We can also use extruded shapes, which are also not very perceptually rich.
Four overlapping squares (left) vs. a cube with four segments (right).
Another alternative is to use isometric shapes joined together in a scene. In the following example, we have 12 cubes joined together in pairs with one end removed. These long cubes are then stacked in a tiered arrangement. While this example is largely decorative, this structure could also be made to be interactive.
This structure forms an isometric lattice (a type of axonometric projection) that provides the illusion of a 3-D scene without fully representing the third dimension [3]. To accomplish this, a full isometric lattice is projected at a 120 degree angle, with three prominent sides of a projected object (in this case, a cube) displayed at a 60 degree angle. Isometric geometries have been used in video game design for many years, including games such as Zaxxon, Q*Bert, and classic Sim City. We can also use them to create objects and projections for representing datasets and their structure. The latter will be the subject of a future post.
Isometric "hive" of square pipes in stationary 3-D.
UPDATE (2/2/2018): Orthogonal Research Badge System now has a microcredential in 3-D Power Point Design! Work your way through some simple examples such as basic shape extrusion, then try your hand at more complex models.
NOTES:
[1] for a more detailed demonstration and discussion of Paint 3D, watch "3D Tools in Powerpoint" from the Presentation Guild, featuring Stephanie Horn from Microsoft.
[2] this is done using the Insert Shapes function on the Format toolbar. You must place a shape on the slide, then Format will appear in the Drawing Tools.
[3] Krikke, J. (2000). Axonometry: a matter of perspective. IEEE Computer Graphics and Applications, 20(4), 7-11.
[3] Krikke, J. (2000). Axonometry: a matter of perspective. IEEE Computer Graphics and Applications, 20(4), 7-11.


do you have any solution for this error "Paint 3D is currently not available in your account, Error code 0x803F8001 " ??
ReplyDelete